
Last week I had to help someone who had lost their session password under Windows 10 Pro x64, version 1703 released in March 2017 (ID 10204029). We were in the worst of situations for several reasons:
- The only available account was the one stuck with the lost password. And there was no Administrator account or equivalent activated.
- No USB key for backing up the password had been generated.
- This is a Windows 10 PC, so the traditional methods based on Ophcrack or Offline NT Password & Registry Editor don’t work, at least in my situation. For Kon-Boot however no idea if this one works because it is a shareware, so I didn’t have the possibility to test it.
- It was an Ultrabook lacking optical disc drive (that’s for the even more annoying side of the thing…).
- We didn’t have any restore media to reinstall Windows 10 if necessary, so it wasn’t possible to restore the computer to its original state because the recovery partition provided with the laptop works only in the case of an administrator password is provided.
In other words, the hope of getting out easily and without too much loss was quite low. I was a little desperate after trying for 2 good hours to find a solution. And it was by stuck on the login screen that I had an idea…
Principle
The idea is to hijack a functionality provided by the login screen to launch a Command Prompt so that you can change the password of the blocked account.
Please note that the solution I provide here only applies if you have not encrypted partitions with BitLocker. If this is the case, your data will be permanently lost when changing the password… If you don’t know what it is, you are not concerned. Also note, when changing the session password, all registered passwords (like Outlook or browser passwords) will be removed from the Saved passwords feature.
Prerequisites
Overall, the method requires 2 things:
- A media containing the installation of Windows 10, in DVD format or USB key;
- And a way to start on this media on the computer in question.
Necessary hardware
As mentioned in the introduction, it is simply a Windows 10 installation media. Please note that you don’t need a license key for our operation.
If, as in my case, the computer in question doesn’t have an optical disc drive (DVD-ROM), a USB key will do the trick. In this case, it is also necessary to recover an ISO of Windows 10, or even to create one from another machine, in order to create a bootable USB key with containing the installation program of Windows 10. There are plethora of tutorials on the Web, that’s why I don’t want to detail that procedure here to perform this operation.
Starting on an external device
It is imperative that you find the keyboard key that allows your computer to boot to the DVD-ROM or the USB key containing the installation of Windows 10. To do this, you must look in the settings of your BIOS. For the HP Envy, you must press the Esc key repeatedly: a menu appears with an option to choose the boot device.
I can’t describe this part in details because it depends heavily on the material used.
Method
Now that your Windows 10 installation media is ready and you know how to start on it, do it now. Once the preliminary installation menu appears, press the following keys: Shift + F10. A Command Prompt opens as shown below:

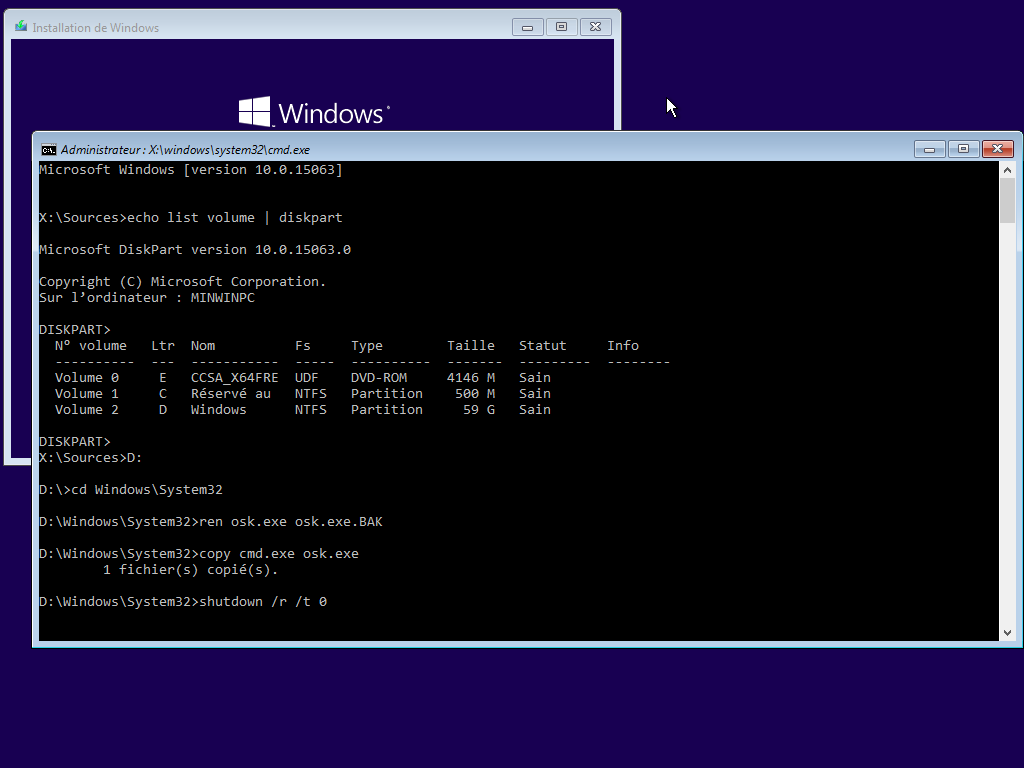
The first thing to do is to determine the partition where your Windows is installed. You’re going to tell me it’s on the C: and you’re probably right. The trick is that Windows Setup can change (temporarily) the order of the partitions, and hence the access letter. To retrieve the correct partition letter where your Windows is accessible (i.e. “mounted”), enter the following command:
|
1 |
echo list volume | diskpart |
The Microsoft DiskPart program will start and list all available volumes. In my case, the installation of Windows is mounted on the D: drive. This is of course only true for this session, once the computer restarted, the partition will resume its original letter which is C:!
Now we can set up our trick. Enter the following commands (in case your Windows partition is D:, customize this as needed!):
|
1 2 3 4 |
D: cd Windows\System32 ren osk.exe osk.exe.BAK copy cmd.exe osk.exe |
If everything is OK, you can restart your computer by entering the following command:
|
1 |
shutdown /r /t 0 |
Here is an example of all the commands entered:
Now that your computer is booted, click the Ease of Access button and then click On-Screen Keyboard (OSK), as shown below.
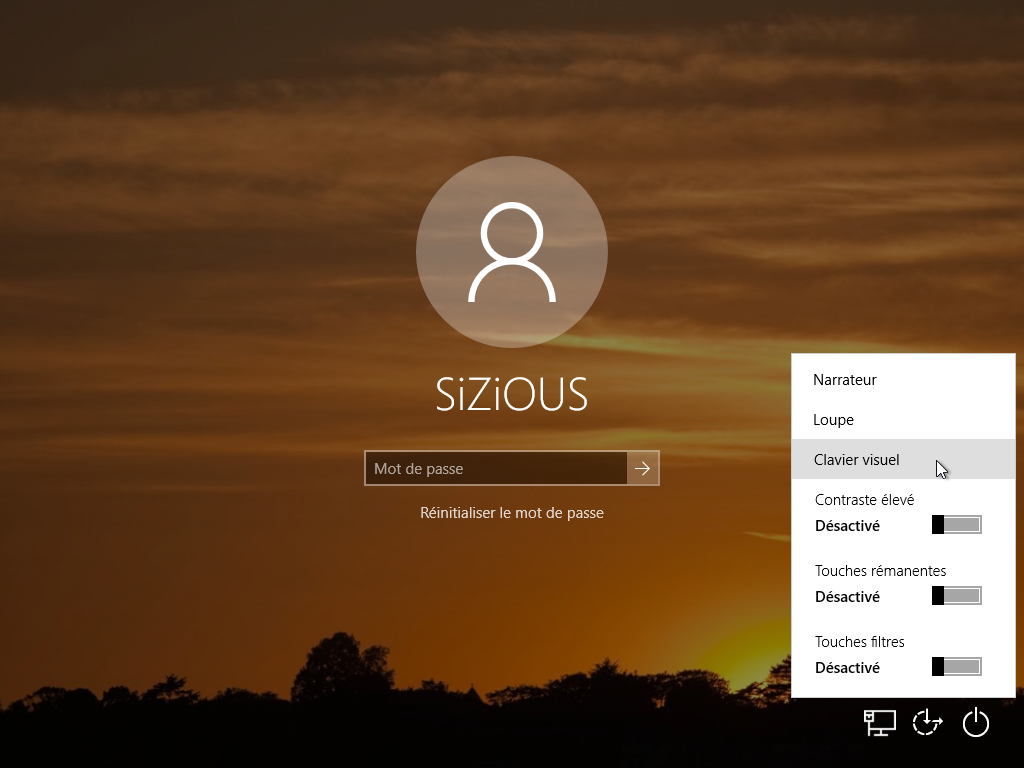
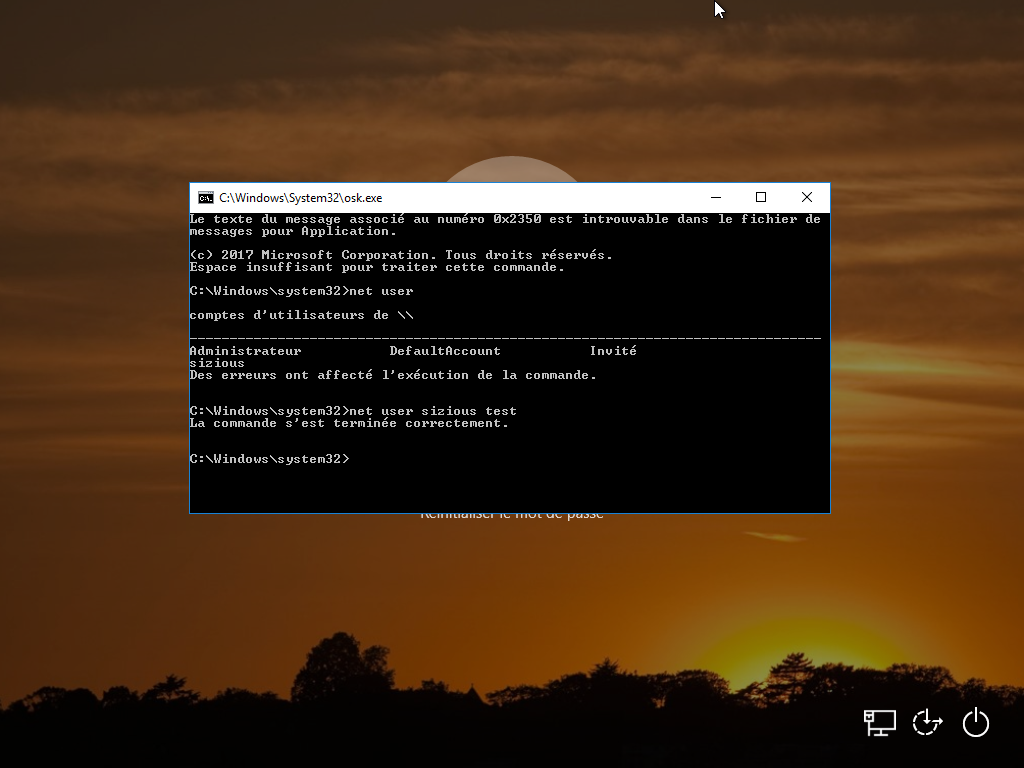
Instead of this one, an cmd Command Prompt will open! Then enter the following command to list the user accounts of the machine:
|
1 |
net user |
In my case, my blocked user account is called sizious. All you have to do now is change the password:
|
1 |
net user sizious test |
Here is an example of the commands entered at this point:
Now, just connect with the new password set (test in my case):

One less fright! 🙂
Restoring the On-Screen Keyboard (OSK)
Now that we have changed our password, we need to restore the replaced On-Screen Keyboard (OSK). To do this, restart again on the Windows 10 installation media, and then press the keys Shift + F10 again.
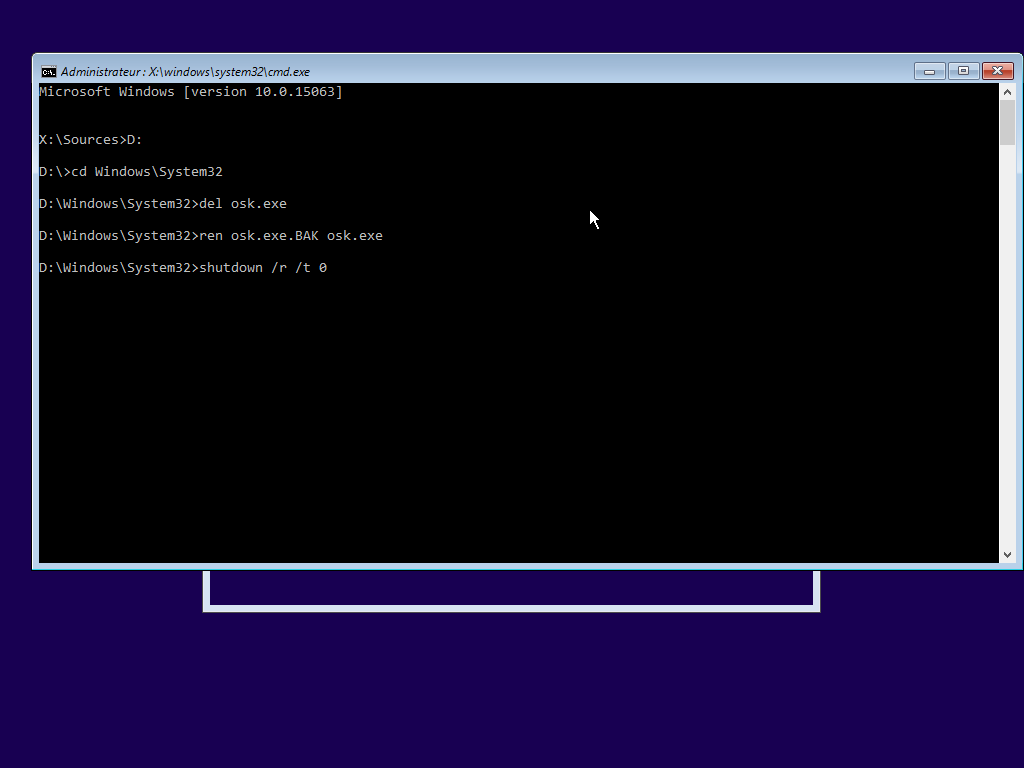
Enter the following commands (adapt the letter D: on!):
|
1 2 3 4 5 |
D: cd Windows\System32 del osk.exe ren osk.exe.BAK osk.exe shutdown /r /t 0 |
Which therefore gives:
After the computer is restarted, select On-Screen Keyboard (OSK) in the Ease of Access options:
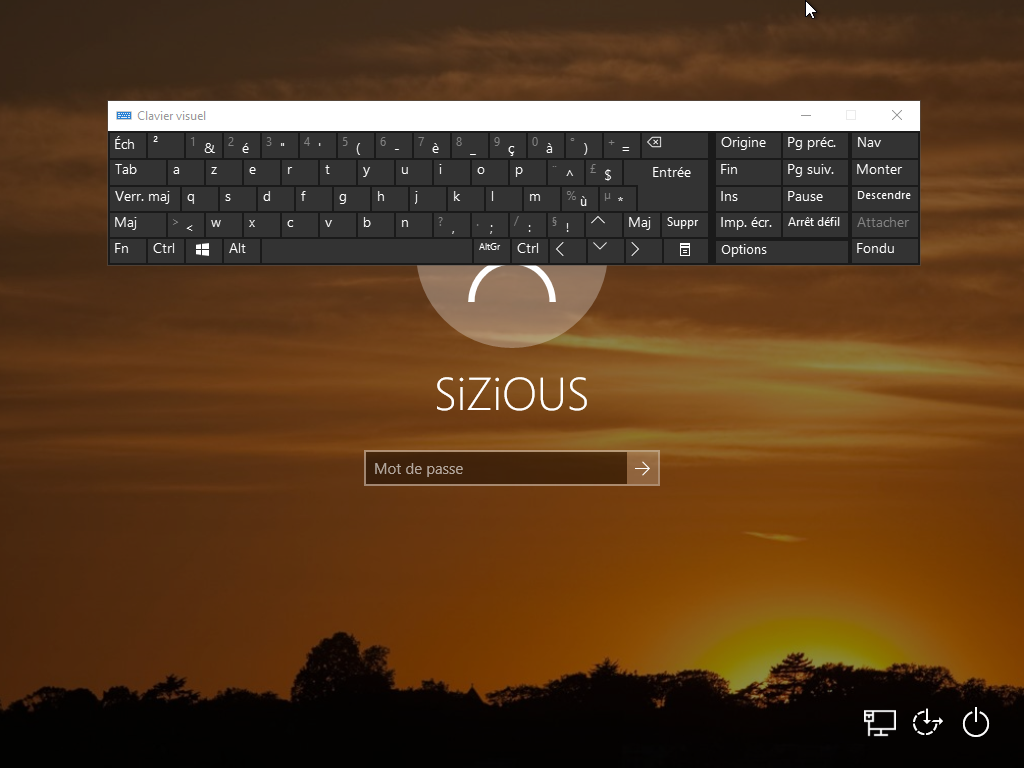
And now, everything is back in order!
Conclusion
You have now changed the password of an inaccessible account! 🙂
Now the necessary warnings: You must do this only on the machines you own and/or with the consent of its owner. I am of course not responsible for the damage and/or mishandling operations, I provide this information for informational purposes only, in the hope that they are useful to you.
Anyway, it saved me more than a day’s work!
 Français